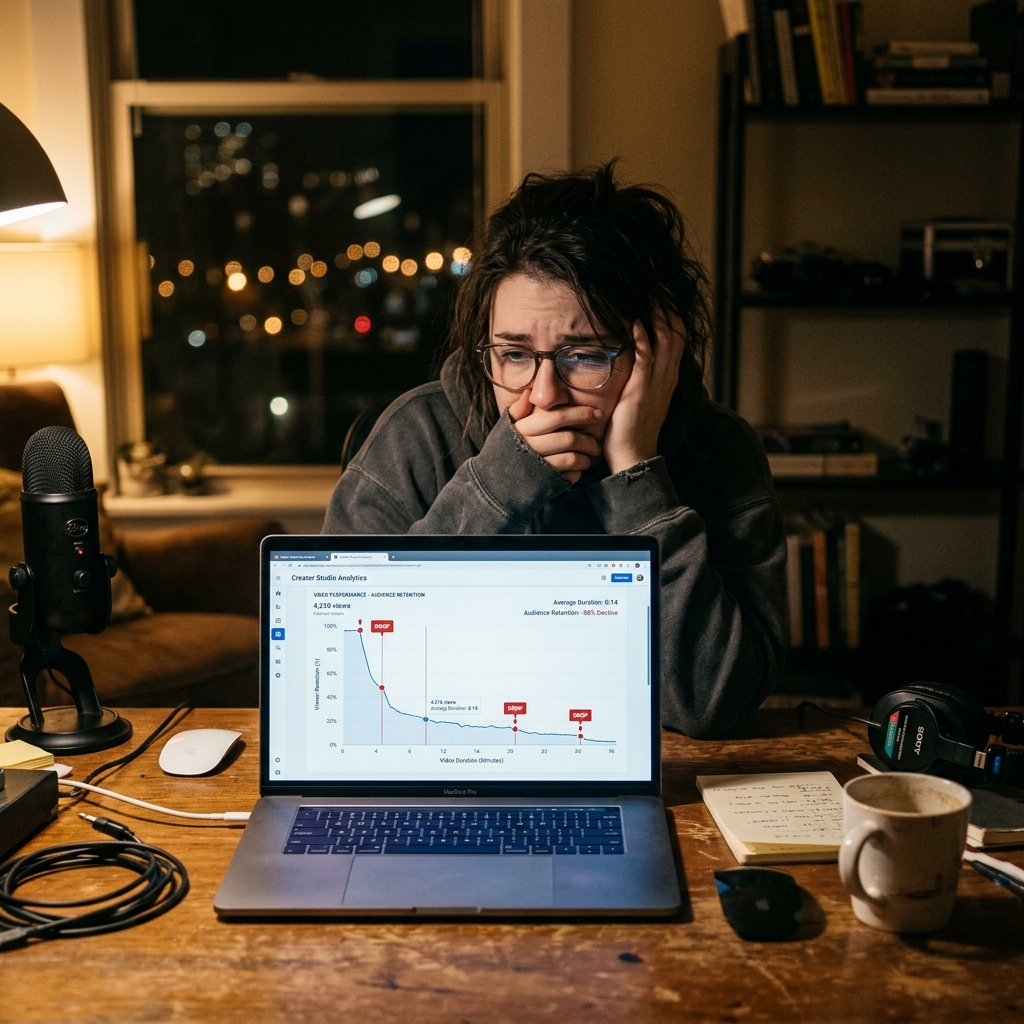
You spend hours outlining, recording, and uploading a new software tutorial. You know the information is highly valuable and solves a real problem. But a few days later, you check your analytics and the reality hits hard: a massive chunk of your audience clicked away before the 30-second mark.
It is incredibly frustrating to see your viewer retention graph drop off a cliff. The natural reaction is to think your script was bad or your voice was boring. But in reality, the problem is rarely what you are saying. The problem is usually what the viewer is seeing.
If a viewer feels overwhelmed, confused, or visually strained in the first few seconds, they will leave and find another video. Here is the candid truth about why your screen recordings are driving viewers away, and the simple recipe to fix it.
Reason 1: Viewers Have to Work Too Hard to See
Think about how people consume content today. A huge percentage of your audience is watching your tutorial on a 6-inch mobile phone screen or a small laptop.
When you share your entire, wide desktop monitor, your complex software interface shrinks down. The specific menu button you are trying to explain becomes a tiny, unrecognizable cluster of pixels. If a viewer has to physically squint to figure out what you are clicking on during the first 30 seconds, their brain registers the tutorial as "too much work," and they scroll away.
Fix: Bring the Action to Them
Professional videos do not make the audience search for the important details. Instead, the camera moves. By using a smart auto-zoom feature, your video should automatically magnify the exact area of the screen where you are working. This removes all the distracting visual clutter on the edges of your screen and clearly communicates, "Focus right here."
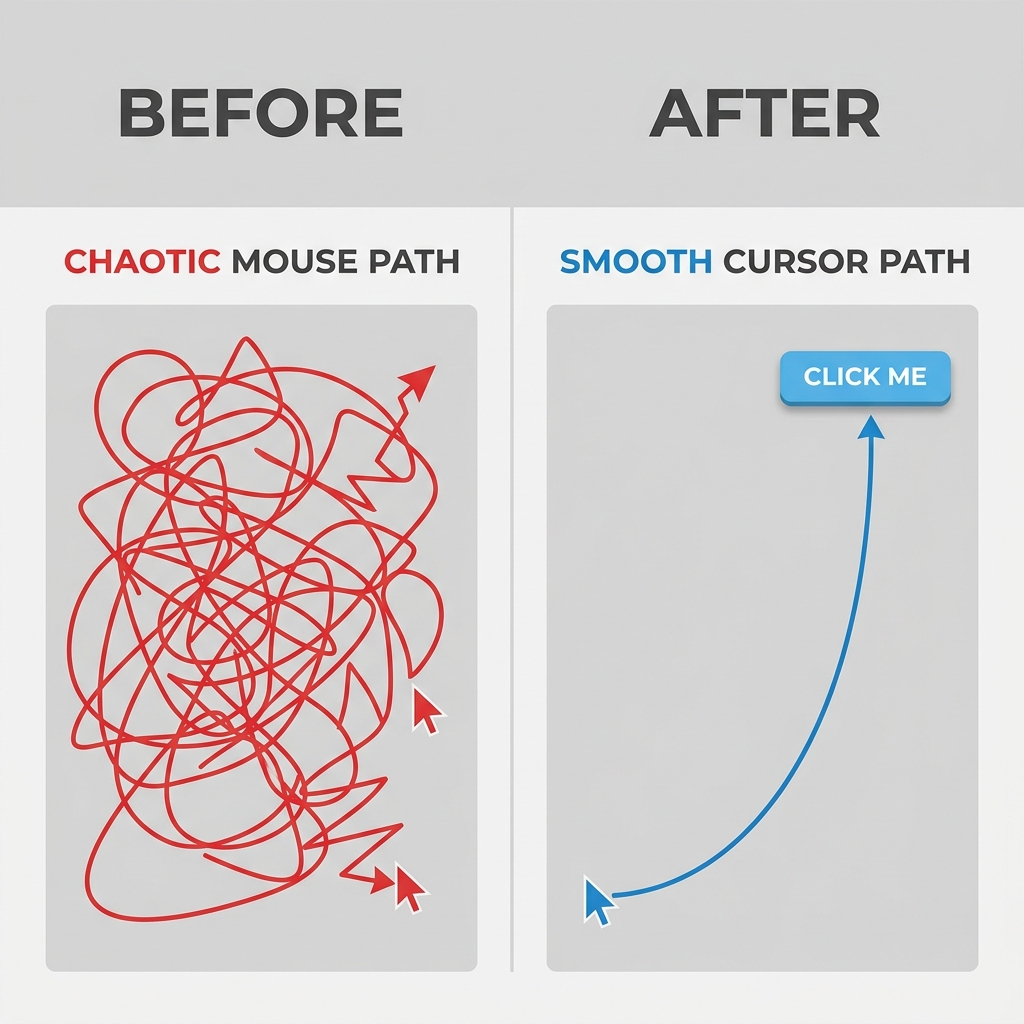
Reason 2: The “Anxious” Cursor Effect
Pay close attention to how you move your computer mouse when you are explaining a concept. Most of us have a habit of wiggling the mouse, tracing fast circles around words, or darting the cursor unpredictably across the screen while we think of our next sentence.
While this feels natural to the person presenting, a frantic, jittery mouse pointer causes visual anxiety for the person watching. It makes the entire presentation feel chaotic, rushed, and unorganized.
Fix: Calm the Visual Guide
Your viewers' eyes naturally track your cursor. A premium tutorial requires deliberate, smooth movement. By using smooth cursor technology, your erratic human mouse movements are translated into elegant, sweeping curves. A cursor that glides cleanly across the screen acts as a calm, confident visual guide, keeping viewers relaxed and engaged.
Reason 3: A Cluttered, Low-Trust Visual Stage
First impressions matter immensely on video platforms. In the first few seconds, viewers are judging your credibility. If your screen recording reveals a messy desktop littered with random folders, distracting browser bookmarks, or a generic, flat background, it immediately signals that this is an amateur video.
Fix: Elevate the Visual Environment
You need to isolate your application and put it on a professional stage. Using a dynamic live background or a rich, smooth color gradient behind your software window instantly changes the aesthetic. It adds cinematic depth and tells your audience that they are watching a high-value, carefully produced presentation.
A Retention-First Recording Framework
Understanding why viewers leave is the first step. The next step is fixing it.
The traditional way to solve these visual problems is to record your raw screen and then spend hours inside a heavy video editing program. You would have to manually keyframe every zoom effect and try to cut out your nervous mouse movements. For most creators and busy professionals, spending three hours editing a five-minute video leads to total burnout.
To create engaging, high-retention tutorials without the heavy lifting, you need a tool that handles the presentation while you record.
This is where Cubix Capture completely changes the workflow. It is built to automatically apply the exact features that keep viewers watching. As you speak, the software seamlessly tracks your clicks with auto-zoom, perfectly smooths out your cursor path, and frames your recording over stunning live backgrounds.
You deliver the information; the recording workflow should protect clarity.
30-Second Retention Checklist
Before publishing, verify:
- first 10 seconds clearly states the video outcome
- active UI area is readable without zooming the player
- cursor path does not create visual stress
- no distracting desktop artifacts in frame
- viewer can follow first key action immediately
What to Test Next
If retention still drops, test one variable at a time:
- clearer opening promise
- tighter first zoom moment
- slower cursor movement in first minute
- cleaner visual staging
Small changes in the first 30 seconds often produce the biggest retention gains.
Related reading: