Most beginners think professional recordings come from advanced editing. In reality, professional-looking screen videos come from a small set of presentation habits applied consistently.
If your current recordings look messy or hard to follow, that is good news: you probably do not need a better script. You need better visual guidance.
This guide gives you a practical, beginner-friendly system to make screen recordings look professional without learning complex editing software.
1) Stop Showing the Entire Screen
The fastest way to look amateur is edge-to-edge monitor capture with no focus.
On smaller screens, your key action becomes tiny and viewers miss critical clicks.
Professional recordings guide attention. They do not make the audience search.
2) Use Clear Step-Based Structure
A professional look is not only visual. Structure matters:
- what this tutorial solves
- what result the viewer will get
- exact step sequence
- final recap and next action
When viewers know where they are in the workflow, trust increases.
3) Tame Cursor Movement
Most people move the cursor in jagged, nervous paths while speaking. That is normal during work, but distracting in a tutorial.
Smooth cursor behavior instantly improves perceived quality. The video feels calmer and easier to trust.
Simple fix: slow down movement, pause before click actions, and avoid circling UI elements repeatedly.
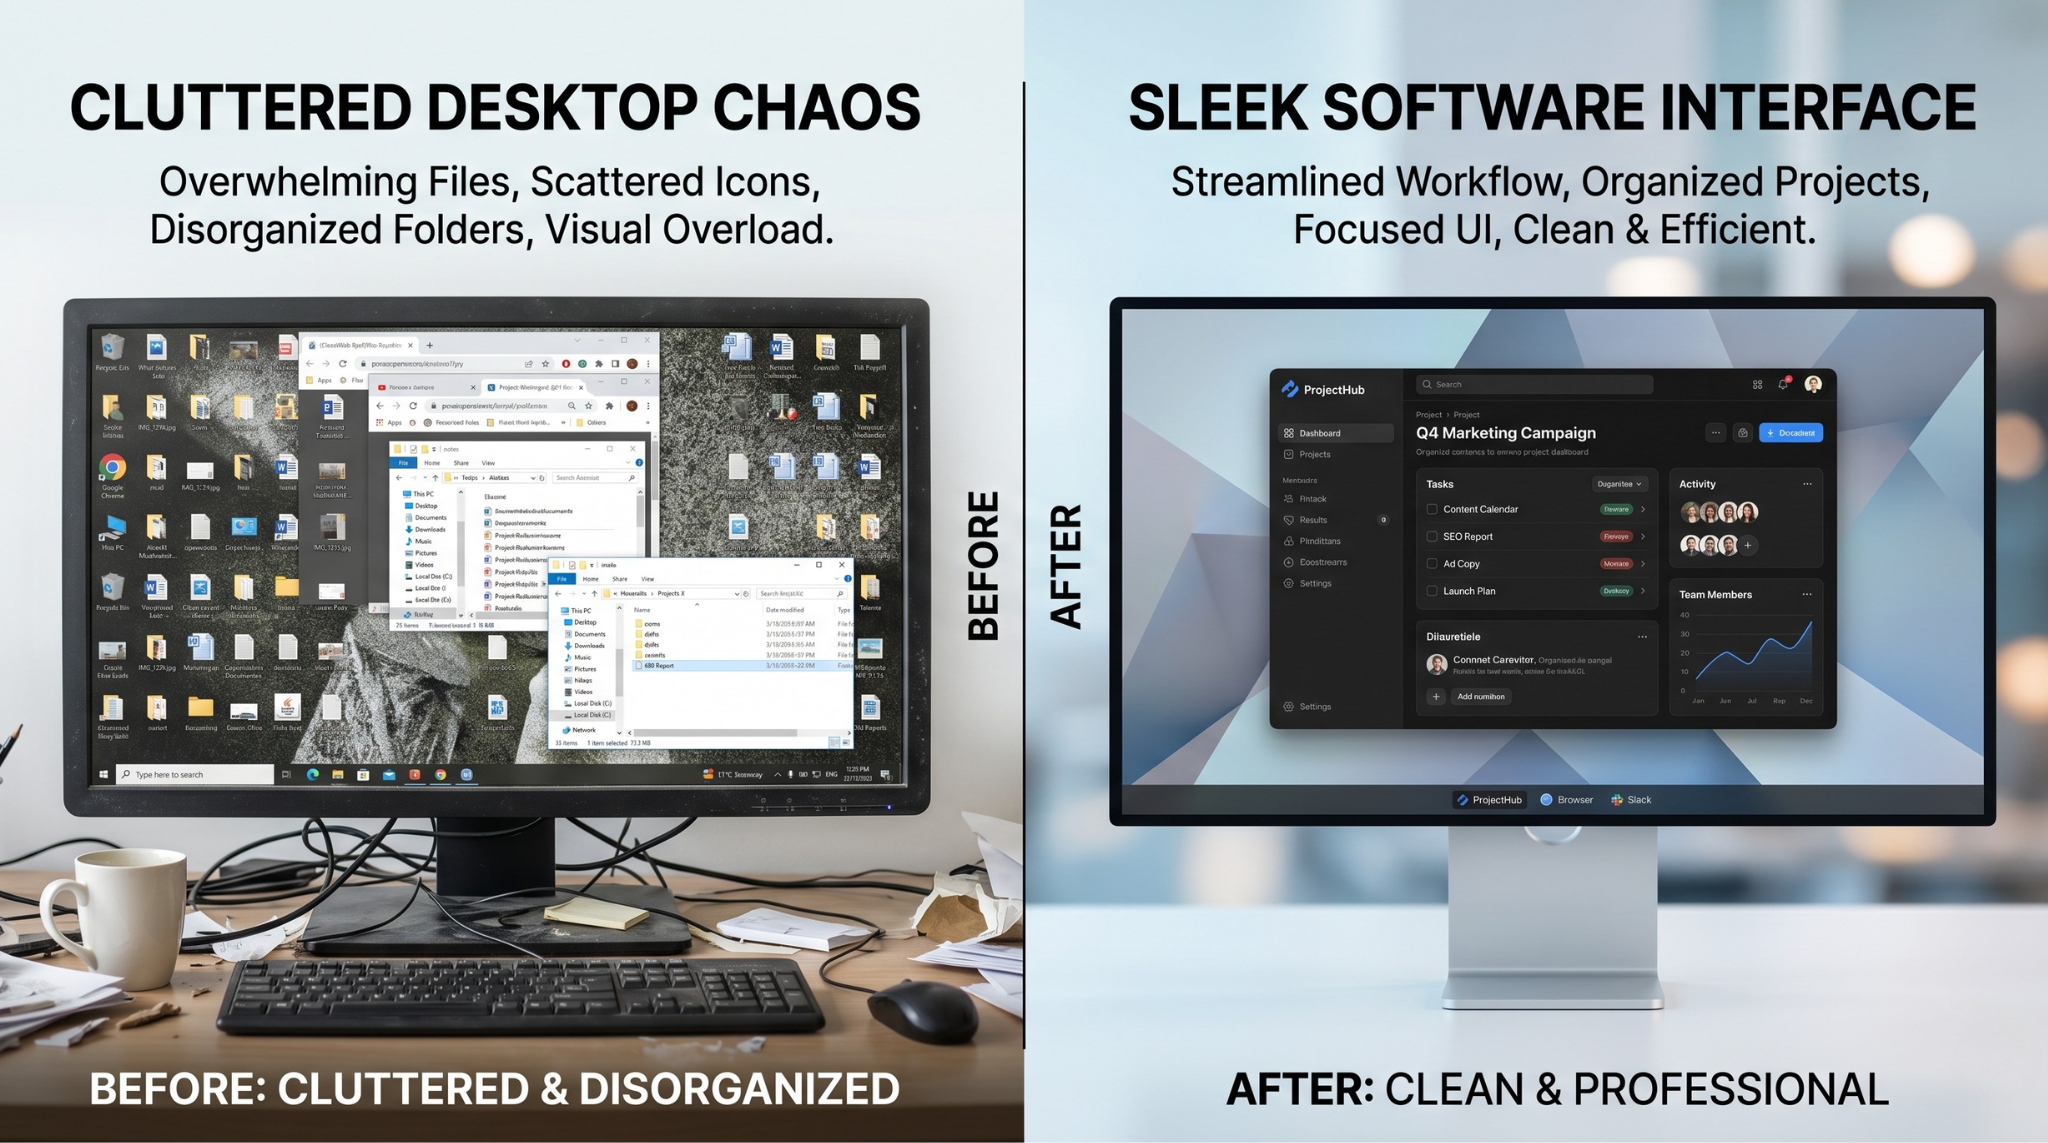
4) Upgrade the Visual Environment
A raw desktop is rarely presentation-ready. Personal folders, notifications, and random wallpaper all compete with your content.
Use an intentional background (like subtle gradients or clean live backgrounds) so the app window remains the hero.
5) Use a Simple No-Edit Production Workflow
Here is a workflow beginners can actually follow:
- Define one outcome for the video
- Prepare the app window and remove desktop clutter
- Enable auto-zoom and cursor smoothing
- Record one clean pass
- Trim only dead space and publish
This is enough for most tutorials, demos, and support walkthroughs.
Beginner Script Template (Copy/Paste)
Use this script skeleton to stay clear:
- "In this video, you will learn how to [outcome]."
- "By the end, you should be able to [specific result]."
- "Step one is [action]..."
- "Now you should see [confirmation state]."
- "Let’s finish with [final step] and quick recap."
This keeps your delivery organized even if you have zero camera confidence.
Quick Quality Checklist
Before publishing, check:
- Can a first-time viewer instantly see where each click happens?
- Is text readable without fullscreen?
- Is cursor motion smooth and deliberate?
- Is the background clean and non-distracting?
- Does the video stay focused on one goal?
If yes, your recording is already in the professional range.
Common Viewer Complaints (And How to Prevent Them)
If viewers often comment:
- "I cannot see where you clicked" -> increase zoom clarity
- "Too fast" -> add pause beats between actions
- "Text is tiny" -> improve framing and scale
- "Hard to follow" -> add clearer step transitions
Use feedback to refine your next recording, not just the current one.
Common Beginner Mistakes
- Recording without a clear outcome
- Explaining faster than the on-screen actions
- Over-zooming every action
- Ignoring cursor jitter
- Trying to fix everything in post
Avoiding these mistakes does more for quality than most editing tricks.
A 7-Day Improvement Plan for Beginners
If you are starting from scratch:
- Day 1: record one short tutorial with focus on framing
- Day 2: improve cursor control and pacing
- Day 3: add gradient/live background consistency
- Day 4: tighten narration with short script prompts
- Day 5: publish and gather feedback
- Day 6: refine based on drop-off points
- Day 7: publish version two with one major improvement
A week of deliberate practice can transform recording quality dramatically.
Tooling Note
If you want these improvements without a heavy editing process, Cubix Capture applies auto-zoom, cursor smoothing, and live backgrounds during recording.
Final Takeaway
You do not need advanced editing skills to make professional screen recordings. You need clean focus, smooth motion, and a repeatable workflow. Master those three, and your videos will immediately look more credible.
Related reading: